
Uncategorized
How to Replace a Pool Cue Tip in 5 Easy Steps
Jul
A pool cue tip may not be the most exciting piece of equipment you own, but it certainly has an impact on your play. This is why it’s important to keep an eye out for wear and tear and replace your cue tip before it blows up your game. Whether you play occasionally or every chance you get, knowing how to replace a pool cue tip is an important skill to have.
We’ll walk you through the process of a pool cue tip replacement in easy-to-follow steps, providing you with the confidence to handle this essential maintenance task on your own. And remember, everything you need – from tools to high-quality replacement cue tips – can be found at Cues Store Australia, your trusted source for all things billiards.
 Step 1: Gather Your Tools
 Step 2: Remove Old Cue Tip
 Step 3: Prep the Cue
 Step 4: Attach New Cue Tip
 Step 5: Shaping and Finishing
Step 1: Gather Your Pool Cue Tip Replacement Tools
Having these essential cue tip tools simplifies the job of replacing a pool cue tip and ensures that you achieve a professional result:
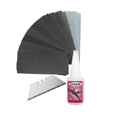
- Utility Knife/Razor Blade: You’ll need a cutting tool to remove the old tip.
- Cleaning Solvent: A good cleaning solvent will help you prepare the cue ferrule by removing any old glue residue, ensuring a clean surface for the new tip.
- Sandpaper or Tip Shaper: To create a perfectly rounded tip surface, you’ll want some fine grit sandpaper or a dedicated tip shaper.
- Cue Tip Cement: Quality adhesive is necessary to attach the new tip securely. Look for a reliable cue tip cement to ensure your tip stays put during intense gameplay.
- Cue Tip Clamp: This tool keeps the tip firmly in place while the cement dries, ensuring a strong bond.
- Cue Tip Trimmer: This handy tool helps you shape the new tip accurately after it’s applied.
- New Cue Tip: Depending on your style of play, you might prefer a softer tip for better spin or a harder tip for more control. And yes, in case you were wondering, there are dedicated break pool cue tips.

Is It Time to Replace Your Pool Cue Tip?
If your cue tip is worn down to the ferrule, feels too hard, or doesn’t hold chalk well, it’s likely time for a new one. A good cue tip should provide a solid, controlled hit and hold chalk for precise shots. Regularly checking and replacing your tip as needed ensures your game stays sharp.
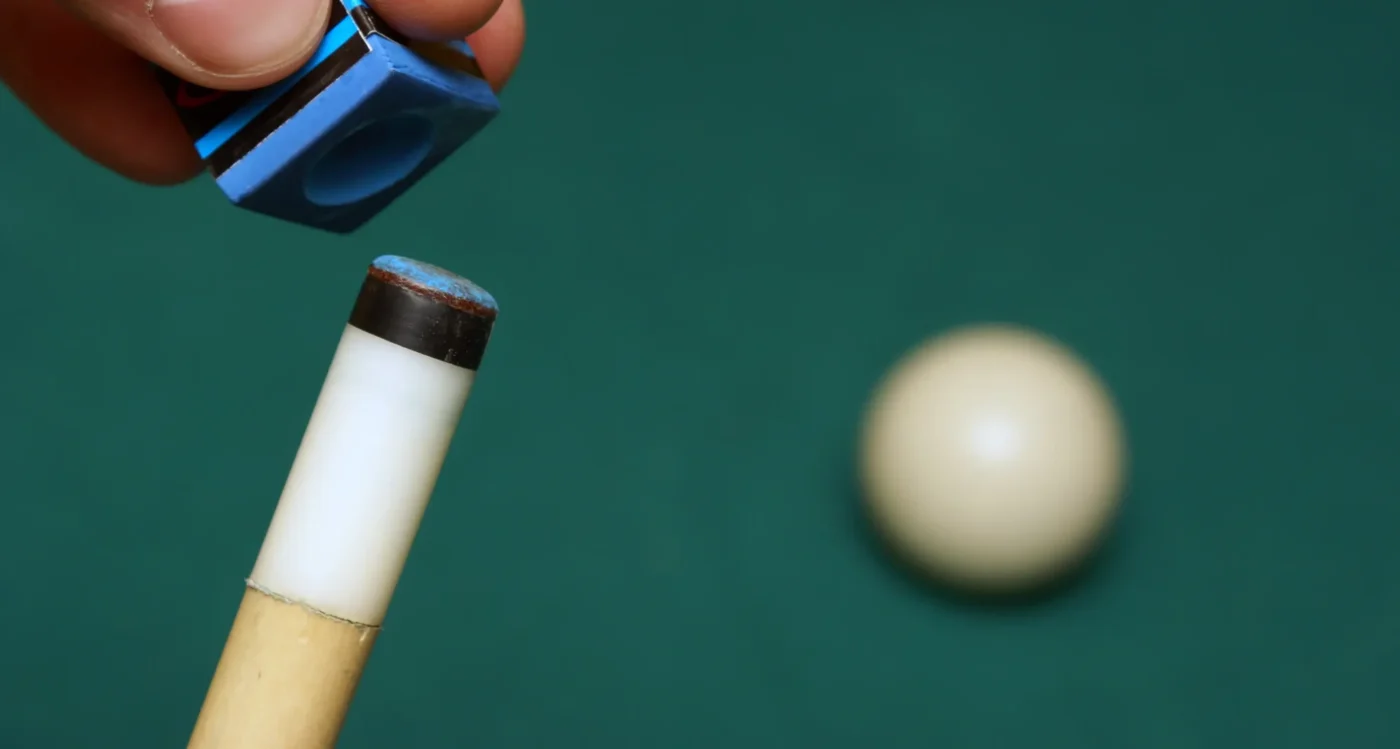
Step 2: Remove the Old Cue Tip
Now that you have your tools ready, it’s time to remove the old cue tip. This step is essential for ensuring that your new tip adheres correctly, providing optimal performance. Here’s how to do it safely and effectively:
- Secure the Cue: Start by placing your pool cue on a stable surface to prevent any movement during the process. Use a cue clamp to provide additional stability.
- Loosen the Old Tip: Use a sharp utility knife or razor blade to carefully cut around the edge of the old tip. Take care not to damage the ferrule (the white or black ring at the end of the cue shaft).
- Remove Residual Glue: Once the tip is detached, gently scrape off any remaining glue on the ferrule. A cleaning solvent can help dissolve stubborn adhesive, making it easier to wipe away.
- Maintain a Smooth Surface: Lightly sand the ferrule with fine-grit sandpaper to ensure a smooth, even surface for the new tip. This step is necessary for a strong bond and an even tip alignment.
Step 3: Prep the Cue for a New Tip
With the old cue tip removed, it’s time to prepare your cue for the new tip:
- Clean the Ferrule: After removing the old glue, ensure the ferrule is spotless by using a microfiber cloth and a bit of rubbing alcohol.
- Check for Smoothness: Feel the ferrule with your fingertips to ensure it’s perfectly smooth. If you notice any rough spots, gently sand them down until smooth to ensure effective adhesion of the new cue tip.
- Measure the New Tip: Place the new tip on the ferrule to check its diameter. If the tip is slightly larger, don’t worry; you’ll trim it later.
- Test Alignment: Before applying glue, practice aligning the tip on the ferrule. This will give you confidence when it’s time to set it permanently, ensuring proper placement and alignment.
Step 4: Attach the New Pool Cue Tip
Attaching the new pool cue tip correctly is important and can significantly impact your game. Here’s how to do it like a pro:
- Apply Cue Tip Cement: Apply a small amount of cue tip cement to the ferrule. Apply evenly to ensure full coverage without excess spillage. Remember, a reliable cement from FCI Billiards ensures a strong, lasting bond.
- Attach the New Tip: Gently press the new tip onto the ferrule, ensuring it’s perfectly aligned. Hold it in place for a few seconds to allow the glue to set initially.
- Secure With a Cue Tip Clamp: Use a cue tip clamp to keep the new tip firmly in place. Leave the clamp on for the recommended drying time specified by the cement instructions, typically around 30 minutes.
- Check the Bond: Once the cement has dried, lightly press on the tip to ensure it’s securely attached. It should feel solid with no wiggle or movement.
Layered vs. Pressed Leather Tips
Layered leather cue tips are made from multiple thin layers of leather that are stacked and bonded together. Layered tips are favored by players who prioritize control and precision, as they provide a consistent response and hold chalk well. They also tend to last longer.
A pressed leather cue tip is made from a single, solid piece of leather that’s compressed to create a firm surface. Pressed tips are harder and denser, which can offer more power and speed in your shots. However, they may not hold chalk as effectively and can lose their shape faster, especially under frequent use.